Car photography needs image editing to look stunning without reflections. Learning to remove reflections in Photoshop can make your car photos stand out. This article will show you how to do it step by step, using important tools and techniques.
Reflections can ruin a car photo. But with the right tools like the Clone Stamp Tool and Healing Brush, you can remove them. This will take your car photography to a new level.
This guide is for both professional photographers and hobbyists. It covers everything from car photography basics to advanced editing techniques. We aim to help you get a reflection-free finish.
Understanding Car Reflections in Photography
Car reflections can be a big issue in photography, especially with shiny or metallic cars. Knowing about different reflections is key for editing car photos. Reflections fall into two main types: specular and diffuse.
In car photos, specular reflections look like mirrors on smooth surfaces. Diffuse reflections are scattered on rough surfaces. Knowing these types helps remove unwanted reflections and makes images look natural.
Types of Car Reflections
- Specular reflections: appear on smooth surfaces, such as glass or metallic paint
- Diffuse reflections: appear on rough surfaces, such as matte paint or textured surfaces
Why Reflections Need Removal
Reflections can be distracting and take away from the main subject. In car photography, removing reflections is key for a clean, professional look. Editing techniques like cloning and healing can remove unwanted reflections and make images look natural.
Common Reflection Problems
Common issues in car photography include reflections on glass and metallic surfaces. Understanding these problems and using editing techniques can help photographers get professional results.
Essential Photoshop Tools for Reflection Removal
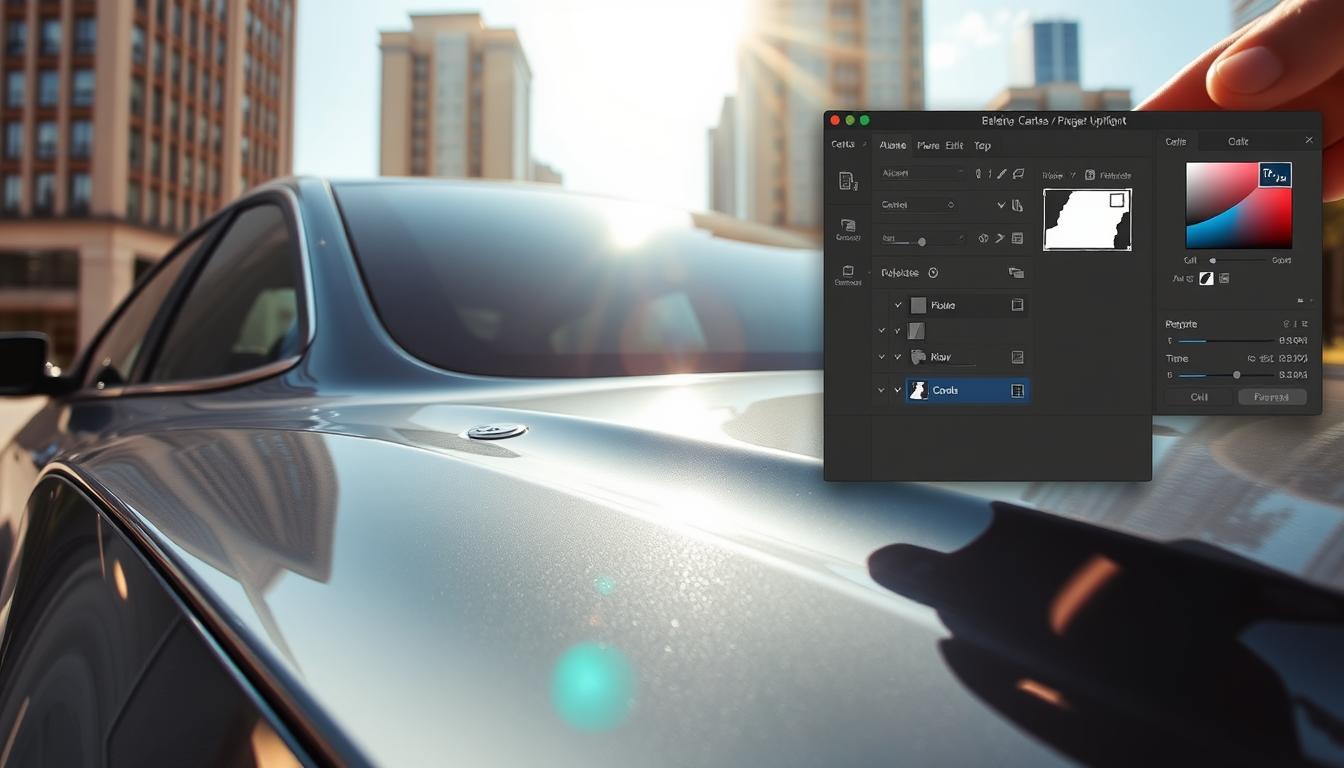
Removing reflections in Photoshop is key, and the right tools make it easier. Photoshop has many tools for this task, like the Clone Stamp Tool, Healing Brush, and Spot Healing Brush. These Photoshop tools are vital for top-notch graphic design results.
Choosing the right brush size, hardness, and opacity is crucial for good results. Here are some important tools and techniques to know:
- Clone Stamp Tool: for duplicating areas of an image
- Healing Brush: for blending areas of an image
- Spot Healing Brush: for quickly removing small blemishes
Learning to use these Photoshop tools well can greatly improve your graphic design skills. It also boosts your reflection removal abilities.
Preparing Your Workspace in Photoshop
To edit and remove reflections from your car image well, you need to set up your Photoshop workspace. This means adjusting the color mode, resolution, and bit depth of your image. A tidy workspace helps you focus on editing, making your work faster and more efficient.
When setting up, consider these important points:
- Color mode: Pick the right color mode, like RGB or CMYK, based on how you’ll use the image.
- Resolution: Choose a resolution that fits the image’s purpose, whether for printing or digital use.
- Bit depth: Opt for the right bit depth, such as 8-bit or 16-bit, for the best editing.
Managing layers well is also key in Photoshop. Making backup layers and keeping your workspace organized helps you work better and avoid mistakes. With a well-set workspace, you can focus on removing reflections, using tools and techniques to get great results.
Having the right settings and layer management is crucial for a good Photoshop workspace. By setting up your workspace right, you’ll work more efficiently and get better results in removing reflections.
| Settings | Configuration |
|---|---|
| Color Mode | RGB or CMYK |
| Resolution | Dependent on intended use |
| Bit Depth | 8-bit or 16-bit |
How to Remove Reflections on Car in Photoshop: Basic Method
In car photography, reflections can ruin a perfect shot. Luckily, Photoshop reflection removal can fix this. The basic method is simple: pick the reflection, make a new layer, and use the Clone Stamp Tool to erase it.
First, open your image in Photoshop. Use the Marquee Tool to select the reflection area. Then, create a new layer by going to Layer > New > Layer, and name it “Reflection Removal”. This keeps your original image safe.
Next, pick the Clone Stamp Tool and adjust the brush size to fit the reflection. Press Alt and click on a matching area, then release Alt and click on the reflection. Keep doing this until the reflection is gone.
Here are some tips for using the basic method in Photoshop reflection removal for car photography:
- Use a small brush size to avoid removing too much of the surrounding area
- Work in small sections to maintain control and avoid mistakes
- Use the Undo feature frequently to check your progress and make adjustments as needed
By following these steps and tips, you can remove reflections from your car photos using the basic method of Photoshop reflection removal.
| Tool | Use |
|---|---|
| Marquee Tool | Selecting the reflection area |
| Clone Stamp Tool | Removing the reflection |
Using the Clone Stamp Tool for Reflection Removal
The Clone Stamp Tool in Photoshop is great for removing reflections. It’s key to know how to use it for natural-looking results. The goal is to remove reflections without any noticeable changes.
Removing reflections from car photos can be tough. The Clone Stamp Tool helps by copying parts of the image without reflections. You set up the tool, pick reference points, and blend them for a seamless effect.
Setting Up the Clone Stamp
To start, pick the Clone Stamp Tool from the toolbar. Adjust the brush size and opacity to fit your needs. The brush size should cover the reflection but keep details sharp. Adjust the opacity for a natural blend.
Selecting Reference Points
Choosing the right reference points is vital. Pick areas without reflections to clone over the reflections. This needs patience and detail to get a smooth result.
Blending Techniques
Blending is crucial with the Clone Stamp Tool. You must blend the cloned area with the rest of the image naturally. Adjust the tool’s opacity and flow, and use different brush sizes and shapes to achieve this.
Advanced Healing Brush Techniques
The Healing Brush is key for reflection removal in Photoshop. To get better, try making a custom brush or use “Sample All Layers.” These steps give you finer control, making images look more natural.
Here are some tips for the Healing Brush:
- Use the “Fade” command to change the brush’s strength
- Try different brush sizes and shapes for the best effect
- Focus on the reflection’s edges for a smooth blend
Learning these advanced techniques with the Healing Brush boosts your skills. It’s a powerful tool for removing reflections and making your images look professional.

Working with Layers and Masks
Removing reflections on cars in Photoshop requires layers and masks. This method gives you control over the image. It helps create a natural look. Layers, masks, and adjustment layers make editing easy.
First, create adjustment layers. They let you adjust brightness, contrast, and color balance. This way, you can edit without changing the original image. It keeps your edits flexible.
Masking Strategies
Masks are key in layer management. They help hide or show parts of an image. This is crucial for removing reflections. Masks work with adjustment layers for complex effects.
Fine-tuning Layer Properties
After setting up layers and masks, adjust their properties. Change opacity, fill, and blending modes. This fine-tuning makes the image look natural and reflection-free.
Learning to use layers, masks, and adjustment layers in Photoshop boosts your skills. You’ll make images that look great, showing off your subject perfectly.
Dealing with Complex Window Reflections
Removing reflections from car windows can be tough, especially with complex reflections. These happen when light hits multiple surfaces, creating a mix of highlights and shadows. To handle these, you need the right Photoshop techniques.
We’ll look at ways to deal with complex reflections on car windows. You can use the Clone Stamp Tool to remove the reflection carefully. Or, the Healing Brush to mix the area with the pixels around it. Also, window reflections can be lessened with layer masking and blending.
Important things to keep in mind when tackling complex reflections include:
- Selecting the right reference points for the Clone Stamp Tool
- Using the Healing Brush to blend the affected area with the surrounding pixels
- Applying layer masking and blending techniques to minimize window reflections
By learning these Photoshop techniques, you can remove complex reflections from car windows. This makes your images look more real and professional.
Tips for Natural-Looking Results
To get professional-grade reflection removal, focus on natural-looking results. Pay attention to small details like paint texture and the environment. This ensures your edited image looks real and true to life.
Here are some key tips for natural-looking results:
- Maintaining paint texture is crucial, as it greatly affects the image’s look.
- Preserving natural highlights adds depth and dimension to the image.
- Using color matching techniques helps the edited image blend with its surroundings.
Follow these professional tips for natural-looking results that will wow everyone. Always focus on the smallest details. Don’t hesitate to try different techniques until you get the look you want.

Also, using reference images can help you achieve natural-looking results. By studying how light affects different surfaces and textures, you learn to create realistic edits.
| Technique | Description |
|---|---|
| Maintaining Paint Texture | Preserving the original paint texture to ensure a realistic appearance |
| Preserving Natural Highlights | Retaining the natural highlights of the image to add depth and dimension |
| Color Matching Techniques | Using color matching techniques to blend the edited image with the surrounding environment |
Handling Different Car Colors and Finishes
Removing reflections from cars in Photoshop depends on the car’s colors and finishes. Metallic paint, for example, needs a special touch to look real. Knowing how to handle each finish is key to a great edit.
Metallic paint shines brightly and deeply. To keep this look, adjust layer blending modes and brush settings. Matte surfaces, however, need a gentle hand to avoid over-smoothing.
Metallic Paint Considerations
Metallic paint is known for its bright colors and shine. To remove reflections, use the Clone Stamp and Healing Brush tools. The Clone Stamp removes the reflection, and the Healing Brush blends it with the surroundings.
Matte Surface Techniques
Matte surfaces need a soft touch. Use a soft brush with low opacity to remove reflections. This keeps the texture natural. Layer masks also help control the reflection removal for a subtle effect.
Understanding car colors and finishes helps you remove reflections well. Whether it’s metallic paint or matte surfaces, the right techniques and tools are crucial. This way, you can achieve professional-looking results.
- Metallic paint finishes, such as silver, gray, and blue
- Matte surfaces, such as matte black, white, and gray
- Pearl finishes, which have a unique shine and depth
Knowing the car’s colors and finishes helps you tailor your reflection removal. This way, you can get high-quality results that meet your standards.
Common Mistakes to Avoid
Removing reflections in Photoshop can be tricky. It’s important to know the common mistakes to avoid. This way, you can get professional-looking results. Reflection removal needs patience and careful attention.
In Photoshop, mistakes like over-cloning, under-cloning, and bad layer management happen. To avoid these, work on a duplicate layer. Use the “History” panel to keep track of your changes. This makes your reflection removal process better.
Other mistakes to watch out for in Photoshop include:
- Not creating a backup of the original image
- Not using the correct tools for the job
- Not paying attention to the image’s texture and tone
Knowing thesecommon mistakes and how to avoid them helps you get great results in yourreflection removal projects.
By following these tips, you can get better at Photoshop. You’ll get professional-looking results in your reflection removal projects. Always work on a duplicate layer, use the “History” panel, and watch the image’s texture and tone. This way, you can avoid common mistakes and have a successful reflection removal process.
| Mistake | Solution |
|---|---|
| Over-cloning | Use the clone stamp tool with a low opacity setting |
| Under-cloning | Use the clone stamp tool with a high opacity setting |
| Incorrect layer management | Work on a duplicate layer and use the “History” panel to track changes |
Conclusion
Removing reflections from car images in Photoshop is a mix of skill, attention to detail, and practice. This guide has given you the tools to handle tough reflections and achieve top-notch results.
Success in removing reflections comes from using Photoshop’s tools well. Tools like the Clone Stamp, Healing Brush, and Layers are key. Knowing how to use them helps keep your car’s surface looking natural and beautiful.
Whether you’re experienced or new, learning Photoshop car reflection removal can take your car photography to the next level. Keep practicing, and you’ll create images that grab people’s attention and make a lasting impression.
FAQ
What are the different types of car reflections?
Car reflections can be from the car’s shiny surfaces or from the environment. This includes buildings, trees, and other objects.
Why is it important to remove reflections in car photography?
Removing reflections makes photos look clean and professional. Reflections can take away from the car’s design and the photo’s overall look.
What are the essential Photoshop tools for reflection removal?
Key tools for removing reflections include the Clone Stamp Tool, Healing Brush, and Spot Healing Brush. They help remove reflections smoothly and blend them with the car’s surface.
How do I prepare my Photoshop workspace for effective reflection removal?
To get ready, set up your workspace with the right settings. This means choosing the correct color mode, resolution, and bit depth for your image.
What is the basic method for removing reflections on a car in Photoshop?
Start by picking the reflection area and making a new layer. Then, use the Clone Stamp Tool to remove it. This method is a good start for more complex techniques.
How do I use the Clone Stamp Tool effectively for reflection removal?
To use the Clone Stamp Tool well, set it up right and pick good reference points. Adjust the brush size, hardness, and opacity for a seamless result.
What are some advanced techniques for using the Healing Brush in Photoshop?
For advanced Healing Brush use, create a custom brush and use “Sample All Layers.” Apply the “Fade” command for precise, natural results.
How can I work with layers and masks to improve my reflection removal?
Layers and masks are key for removing reflections. Use adjustment layers, masking strategies, and fine-tune layer properties for better results.
How do I deal with complex window reflections in car photography?
Dealing with complex window reflections is tough. Use the Clone Stamp Tool, Healing Brush, and layer masking. Choose the right reference points and blend techniques.
What are some professional tips for achieving natural-looking results when removing car reflections?
For natural results, keep the car’s paint texture and natural highlights. Use color matching and pay attention to the environment. Reference images help too.
How do I handle different car colors and finishes when removing reflections?
Each car color and finish needs a special approach. Use the right brush settings and layer blending modes for metallic, matte, and other finishes.
What are some common mistakes to avoid when removing reflections in Photoshop?
Avoid over-cloning, under-cloning, and bad layer management. Work on a duplicate layer and use the “History” panel for a seamless result.


