In the world of real estate photography, making a good first impression is key. Professional photo editing can really help show off properties in their best way.
Photo editing is very important in real estate. It makes properties look better and draws in buyers. With the right Photoshop techniques, you can turn simple photos into amazing ones.
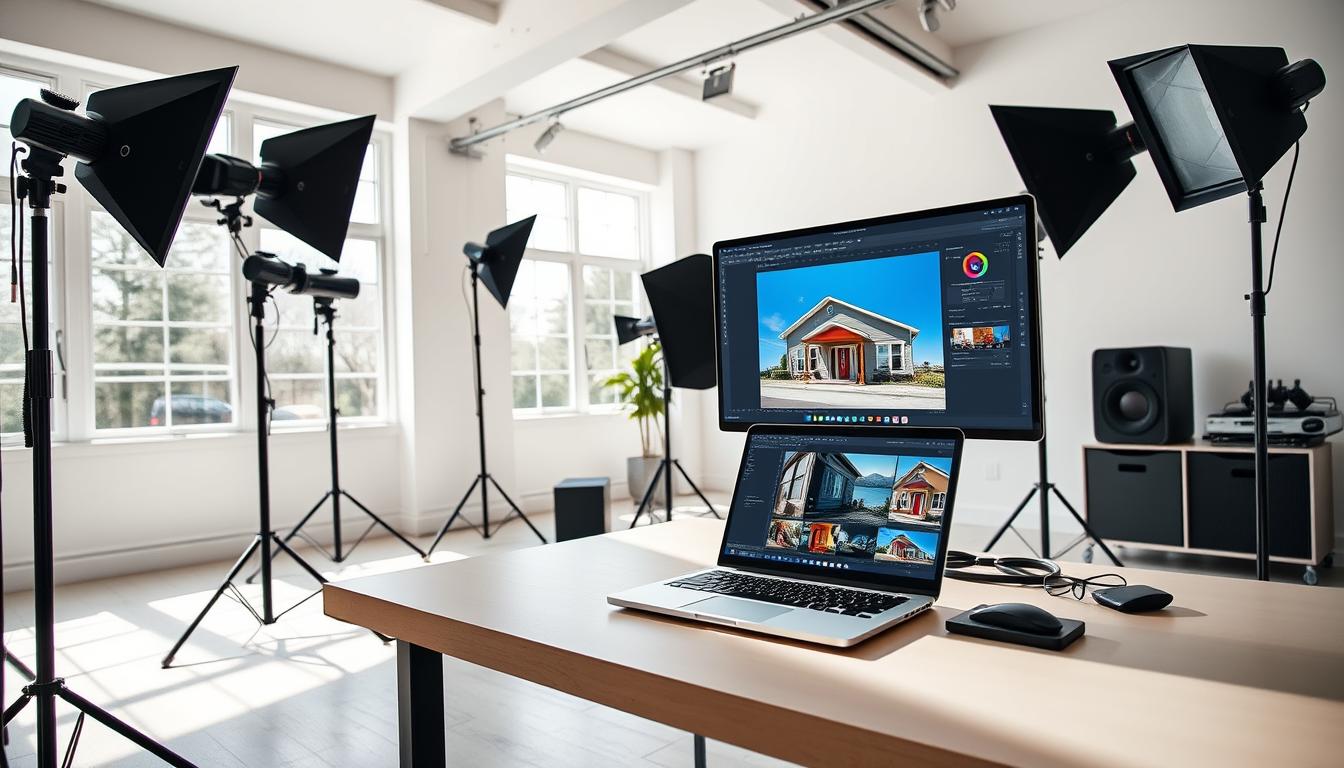
This guide will show you how to edit real estate photos in Photoshop. You’ll learn the key techniques and best practices for top-notch results.
Importance of Professional Real Estate Photo Editing
In the world of real estate, photo editing is key. It helps show properties in the best light. Good images attract buyers and boost sales.
Why Quality Editing Increases Property Sales
Editing makes property listings look better. This draws in more buyers. Professional image enhancement shows off a property’s best sides.
| Benefits of Professional Photo Editing | Impact on Property Sales |
|---|---|
| Enhanced Visual Appeal | Increased Buyer Interest |
| Highlighting Key Features | Higher Sales Rates |
| Professional Presentation | Competitive Advantage |
Setting Realistic Client Expectations
It’s important to be clear about what photo editing can do. Talking about what’s possible helps clients be happy. Knowing what editing can do makes clients value it more.
Essential Photoshop Tools for Real Estate Photography
To edit real estate photos well in Photoshop, you need to know the key tools and methods. Professional real estate photo editing makes a property look better. This can attract more buyers.
Setting Up Your Workspace for Efficiency
A neat workspace is key for fast editing. Make your Photoshop area your own by arranging tools and panels. This way, you can find what you need quickly.
Must-Have Plugins and Extensions for Real Estate
Many plugins and extensions can make your Photoshop better for real estate editing. Camera Raw Filter is a must-have tool.
Camera Raw Filter Essentials
The Camera Raw Filter lets you edit photos without losing quality. It helps with exposure, contrast, and color. It’s great for real estate photos, making them look the same.
Specialized Real Estate Editing Panels
Special panels can make editing easier. They have quick fixes for real estate photos, like better skies or lighting.
Using these Photoshop tools can make your real estate photos better. This can attract more buyers.
Preparing Your Images for Editing
Before you start editing, make sure your images are ready. This makes your work smoother and keeps quality high.
RAW vs. JPEG: Which Format to Choose
Photographers often choose between RAW and JPEG. RAW files give you more editing options because they have more data. But, they take up more space. JPEGs are smaller and ready to use but have less editing flexibility.
Organizing Your Workflow for Batch Processing
Good workflow organization is essential. This means:
- Using a file naming convention to quickly find images.
- Sorting images into folders and subfolders.
- Using batch processing to edit many images at once.
File Naming Conventions
A good file name might include the address, date, and type. For example, “123_Main_St_2023_Exterior.jpg”.
Creating Action Sets for Repetitive Tasks
In Photoshop, action sets help with repetitive tasks. You can record a series of edits. Then, apply them to other images with just one click. This makes your work much faster.
How to Edit Real Estate Photos in Photoshop: Basic Adjustments
Editing real estate photos in Photoshop starts with basic adjustments. These steps make the photos look better. They help show the property’s best sides.
Exposure and Contrast Correction Techniques
Changing exposure and contrast is key in photo editing. Photoshop’s Exposure and Contrast tools help. They let you brighten or darken images and balance light and dark.
Good exposure and contrast make rooms look welcoming. They also make outdoor views more attractive.
White Balance and Color Temperature Adjustments
White balance is important for true colors in photos. Photoshop’s White Balance tool helps adjust color temperature. This corrects color casts and makes colors look natural.
| Adjustment | Description | Effect |
|---|---|---|
| Exposure Correction | Adjusting the brightness of the image | Improves visibility in dark or overly bright areas |
| White Balance | Adjusting color temperature | Corrects color casts for a more natural look |
| Sharpening | Enhancing image clarity | Makes details more defined |
Sharpening and Noise Reduction Methods
Sharpening makes photos clearer. Photoshop’s Sharpen tools help. They make small details stand out.
Noise Reduction tools also play a role. They reduce grain and digital noise. This makes images cleaner.
Learning these basic steps can greatly improve real estate photos. They become more appealing to buyers.
Mastering Perspective Correction for Architecture
Architectural photography needs to be precise. Perspective correction in Photoshop is key. It makes buildings and interiors look right and good-looking, which is important for real estate.
Using the Transform and Perspective Warp Tools
Transform Tool helps with basic photo changes. For harder fixes, the Perspective Warp Tool lets you change an image’s look. You do this by moving a grid overlay.
- Select the Perspective Warp Tool from the Edit menu.
- Apply a grid to the image and adjust the corners to match the desired perspective.
- Use the grid to warp the image, ensuring that vertical and horizontal lines are straight.
Fixing Vertical and Horizontal Lines in Interiors
Interior shots can have lines that look like they’re leaning. To fix this:
- Use the Transform Tool to adjust the image’s perspective.
- Enable the grid to ensure lines are straight.
- Adjust vertical and horizontal lines separately for precision.
Correcting Wide-Angle Lens Distortion
Wide-angle lenses can make things look wrong. To fix this:
Photoshop’s Lens Correction Filter helps with this. It lets you:
- Correct distortion with a simple slider adjustment.
- Adjust the perspective to ensure that lines are straight.
- Scale the image to fit the corrected perspective.
Learning these tricks can make your architectural photos better. This makes your real estate listings more attractive to buyers.
Advanced Color Correction Techniques
To make real estate properties stand out, mastering advanced color correction techniques is key. These techniques not only make the property look better. They also help attract more buyers.
Interior Color Balancing for Natural Lighting
Interior color balancing is key for a natural and inviting look in real estate photos. Adjusting the white balance and color temperature makes spaces warm and welcoming. This means color correction to remove unwanted color casts and get a natural look.
Exterior Color Enhancement for Curb Appeal
Exterior color enhancement boosts a property’s curb appeal. Making the exterior colors pop, like the facade and landscaping, attracts buyers. Using color correction techniques makes the exterior vibrant and appealing.
| Technique | Description | Benefit |
|---|---|---|
| Interior Balancing | Adjusting white balance and color temperature | Natural and inviting interior |
| Exterior Enhancement | Enhancing exterior colors | Increased curb appeal |
| Color Schemes | Creating consistent color schemes | Professional and cohesive look |
Creating Consistent Color Schemes Across Property Photos
Creating consistent color schemes in all property photos is vital. It shows a professional and cohesive look. This means using the same color correction techniques for all photos.

Removing Unwanted Elements and Distractions
To make real estate listings stand out, photographers must learn to remove distractions. Unwanted elements can make a property less appealing. Photoshop has tools to help with this.
Content-Aware Fill for Large Object Removal
The Content-Aware Fill tool is great for removing big unwanted objects. It fills the area with content that matches the surroundings. This makes the removal look seamless.
Clone Stamp and Healing Brush for Detail Work
The Clone Stamp and Healing Brush tools are very useful for detailed work. The Clone Stamp duplicates areas precisely. The Healing Brush blends the area with the surroundings, making it look natural.
Dealing with Reflections, Glare, and Shadows
Reflections, glare, and harsh shadows can be distracting. Adjusting exposure and using the Clone Stamp to remove glare helps. Enhancing shadows also improves image quality.
| Tool | Primary Use | Benefit |
|---|---|---|
| Content-Aware Fill | Large object removal | Seamless integration with surroundings |
| Clone Stamp | Detail work and duplication | Precision in editing |
| Healing Brush | Blending cloned areas | Natural-looking results |
Real estate photographers can make properties more appealing by mastering these tools. Using these tools effectively removes distractions. It also improves the quality of the images.
Sky Replacement and Exterior Enhancement
Changing the sky in photos can really make a property stand out. It also makes the listing look better. This is called sky replacement and exterior enhancement.
Using Photoshop's Sky Replacement Tool
Photoshop’s Sky Replacement tool is very useful. It lets you change the sky in photos easily. Just pick the sky area, choose a new sky, and adjust it as needed.
Manual Sky Replacement for Complex Scenes
For tricky scenes, you can do it manually. This means picking the sky area yourself. Then, use layer masking to mix the new sky with the rest of the photo.
Enhancing Landscaping and Exterior Features
It’s important to make the property look good. This includes lawn and garden enhancement and pool and water feature editing.
Lawn and Garden Enhancement
To improve the lawn and garden, you can change colors. Remove weeds or debris. Make it look green and neat.
Pool and Water Feature Editing
Editing pools and water features makes them look inviting. Make the water clear. Adjust reflections. Make sure they stand out.
Window Mastering: The View-Through Technique
In real estate photography, the view-through technique is more than adjusting exposure. It’s about making the inside and outside of a property look like they’re connected.

Photographers need to balance the inside and outside light. They do this by changing the exposure to show details in both areas.
Balancing Interior and Exterior Exposure
They use HDR or exposure bracketing to capture more light. This makes sure both inside and outside are well-lit.
Creating Natural-Looking Window Views
To make windows look natural, they focus on color and contrast. Changing these helps the view through the window look better.
Compositing Techniques for Perfect Windows
Compositing can make the window view even better. This might mean swapping the outside view for a nicer one or adjusting the colors to match the inside.
Mastering the view-through technique makes photos of properties look better. This makes them more appealing to people who might buy them.
Adding Finishing Touches to Interior Spaces
Improving interior spaces in real estate photos can really help attract buyers. How we show these spaces can change how buyers see the property.
Enhancing Kitchen and Bathroom Spaces
Kitchens and bathrooms are key areas to focus on. Adjusting the lighting and enhancing the colors makes them look better. For kitchens, make countertops, appliances, and cabinets look clean and modern.
In bathrooms, make sure fixtures, tiles, and mirrors are well-lit. This helps avoid distractions.
Making Living Areas More Inviting
Living areas, like living rooms and dining rooms, need to feel warm and welcoming. Balance the exposure and adjust the color temperature for a cozy feel. Also, remove any clutter or unwanted objects to highlight the room’s best features.
Proper Lighting Enhancement for Mood
Lighting greatly affects a room’s mood. Enhancing the lighting in interior spaces makes them more inviting. Adjust brightness and contrast to create a cozy atmosphere.
What Changes Are Acceptable vs. Misleading
It’s important to know what edits are okay and what are not. Good edits make the photo better without changing its true nature. Bad edits can make the property look different than it really is.
| Edit Type | Description | Acceptability |
|---|---|---|
| Brightness and Contrast Adjustment | Enhancing the overall visibility of the image | Acceptable |
| Removing Minor Distractions | Eliminating small objects that don’t significantly impact the property’s appearance | Acceptable |
| Altering Architectural Features | Changing the structure or layout of the property | Misleading |
Disclosure Requirements for Edited Photos
Being open about photo editing is very important. Rules say that big changes must be told to everyone. This way, everyone knows what’s been done to the photos.
Best practices for disclosure include:
- Clearly labeling edited images
- Providing information about the nature of the edits
- Ensuring that all stakeholders understand the editing process
Conclusion: Elevating Your Real Estate Photography
Learning to edit real estate photos is key. It helps show properties in their best way. By using what you’ve learned, you can make great photos that grab buyers’ attention.
Following the best practices in the industry makes your photos look good and true. This builds trust with your clients. It also helps you stand out in a crowded market.
Keep working on your photo editing skills. Practice and patience are important. Keeping up with new Photoshop tools and methods will keep you ahead. With both skills and knowledge, you can make amazing real estate photos.
FAQ
What is the best format for editing real estate photos, RAW or JPEG?
RAW is better for editing real estate photos. It has more data than JPEG. This makes editing easier.
How do I correct perspective distortion in architectural photography using Photoshop?
Use Photoshop’s Transform and Perspective Warp tools. They help fix perspective issues. This makes lines straight.
What are the essential Photoshop tools for real estate photo editing?
Key tools include Camera Raw Filter and real estate panels. Also, Clone Stamp, Healing Brush, and Content-Aware Fill. They help with exposure, removing objects, and color.
How can I enhance the curb appeal of a property through photo editing?
Use Photoshop to change colors and brightness of exterior photos. This makes the property look better. You can also improve landscaping.
What is the view-through technique for window editing, and how is it achieved?
The view-through technique balances interior and exterior light. This makes windows look natural. Adjust exposure and contrast for both areas.
How do I remove unwanted elements from real estate photos?
Use Content-Aware Fill for big objects. For small details, use Clone Stamp and Healing Brush. This cleans up the photo well.
What are the ethical considerations in real estate photo editing?
Follow industry standards and avoid misleading edits. Always disclose edited photos. Edits should enhance the property truthfully.
Can I use Photoshop to replace the sky in real estate photos?
Yes, Photoshop has a Sky Replacement tool. You can also manually change the sky for complex scenes.
How do I organize my workflow for efficient batch processing in Photoshop?
Use file names and action sets for tasks. Batch processing in Photoshop makes editing faster.
What are some advanced color correction techniques for real estate photos?
Use interior color balancing for natural light. Enhance exterior colors for curb appeal. Create consistent colors for a unified look.


