Editing chrome surfaces in photos can be tough but rewarding. Reflective surfaces, like polished chrome, often have unwanted reflections. This guide will help you master Photoshop chrome reflection removal. It’s designed for everyone, from beginners to experts, to learn how to edit chrome surfaces perfectly.
If you’re new to Photoshop or a pro looking for a flawless finish, this tutorial is for you. We’ll explore how to make your images with chrome surfaces look amazing. You’ll learn the key techniques for a reflection-free finish.
Overview of Chrome Reflection Removal
The journey of understanding reflection removal starts with knowing that chrome reflection challenges can make photos less appealing. Removing reflections from chrome surfaces is more than just adjusting settings. It involves complex and creative photo editing techniques.
Reflections on chrome surfaces can mess up your photo. They can come from light or objects around your subject. The goal of chrome reflection removal is to fix these issues without harming the image.
- First, check how the reflection affects the image.
- Use detailed photo editing techniques to reduce or remove reflections.
- Make sure the adjustments don’t ruin the chrome’s texture.
Learning about this process is key for improving your photo editing skills. Tackling chrome reflection challenges needs both technical know-how and creativity. It’s about seeing past the reflections to the true beauty of the image. Remember, each photo needs a special approach based on its unique reflection issues.
Understanding Reflections in Photography
In photography, learning how light interacts with surfaces can make a big difference. This section will cover different light reflections, chrome issues, and how to manipulate reflections in photos. Knowing these things is key for photographers to tell better stories with their images.
Types of Reflections
Light behaves differently on various surfaces, leading to different reflections. Specular reflections happen on smooth surfaces like glass, creating a mirror-like effect. Diffuse reflections occur on rough surfaces, scattering light and making the reflected image less sharp.
Challenges of Chrome Surfaces
Chrome surfaces are tricky because they reflect everything clearly. This can cause glare and unwanted highlights, taking away from the main subject. Photographers must learn to control these reflections to get the right look.
Fixing chrome issues requires a sharp eye and knowledge of light. Adjusting the light’s angle, using polarizing filters, and shooting at the right time can help. These steps can reduce glare and make the subject stand out.
Photographers also use software like Photoshop to tweak reflections. Tools can adjust brightness and contrast, and remove unwanted reflections. This helps keep the focus on the subject, not the reflections.
By exploring these topics, photographers can master reflective surfaces. This turns what might be problems into beautiful parts of their photos.
Essential Tools in Photoshop for Reflection Removal
Removing unwanted reflections from chrome surfaces can be tough. But, with the right Photoshop tools, it’s easier. We’ll look at three key tools: the Clone Stamp Tool, Healing Brush Tool, and Patch Tool. Each has its own role in editing.
Clone Stamp Tool
The Clone Stamp Tool is great for precise pixel control. You pick a source point and then paint over the unwanted reflection. It’s best for big areas where you need to copy details from nearby sections.
Healing Brush Tool
The Healing Brush technique is for subtle corrections. It blends the source pixels with the target area’s color and texture. It’s perfect for small, unwanted reflections and imperfections, making the fixes look natural.
Patch Tool
The Patch Tool makes removing irregular-shaped reflections easy. You select the affected area and drag it to a cleaner part of the image. It adjusts texture, lighting, and shading to match the surroundings, helping you get professional results.
Learning these Photoshop tools helps photographers and editors tackle tough reflection removal tasks. They can create clean and pleasing images.
Preparing Your Image for Editing
Before you start removing reflections, it’s important to prepare your image in Photoshop. This first step helps keep your original image safe and makes it easier to edit later.
Creating a Backup Layer
Making a backup layer is a key part of editing. This lets you edit without losing the original quality. It also gives you the chance to try different edits without worrying about losing your image.
Assessing the Reflection
Removing unwanted reflections starts with a careful reflection evaluation. Zoom in on the reflection areas and look at how intense, angled, and wide they are. Knowing these details helps you choose the right tools and methods for removing the reflection.
Starting with these steps makes your editing work better and more effective. It helps you get a high-quality final image. Proper preparation is the foundation for a successful editing session.
Step-by-Step Process of Removing Reflections
Removing unwanted chrome reflections from photos needs careful steps. This guide uses Photoshop to simplify the process. Follow these steps for clear, reflection-free images:
- Evaluate the Image: Open your photo in Photoshop and look at the reflection areas. Zoom in to see how big the reflections are and where they are.
- Create a Duplicate Layer: Work on a copy of the layer to keep the original safe. Use Ctrl+J on Windows or Cmd+J on Mac to duplicate it.
- Use the Patch Tool: Pick the Patch Tool from the toolbar. Drag it over the reflection to select it, then move it to a skin area without reflection. This blends the area well with the rest of the image.
- Refine Edge: For a smooth removal, go to ‘Select and Mask’ to refine the patch edges. This step is key to blending the patch area with the rest of the image.
- Clone Stamp for Final Touches: Use the Clone Stamp Tool for small fixes.
As you work, turn the edited layer on and off to see your changes. This helps you keep your edits natural and avoid overdoing it.
How to Remove Chrome Reflection in Photoshop
Learning to remove chrome shine Photoshop can make your photos look clearer and more polished. This guide will show you how to eliminate reflections from chrome or metallic surfaces using Photoshop editing techniques.
To begin, you’ll need to use specific tools in Photoshop for removing reflections. The patch tool, clone stamp, and healing brush are essential for this task.
- Select the patch tool for larger areas of unwanted shine.
- Use the clone stamp for finer, more detailed areas where control is important.
- Apply the healing brush to blend the edits naturally into the rest of the image.
It’s important to use these tools carefully to keep the metal looking natural. Too much editing can make the photo look unnatural and change its original look. Below is a table with typical settings to start with for each tool:
To successfully remove chrome shine in Photoshop and eliminate reflections, you need to adjust your tool settings based on the photo. Practice and patience are crucial, as each photo may need a different approach.
To improve your skills, consider learning more Photoshop editing techniques through online tutorials or courses. Learning continuously will help you tackle different editing challenges more effectively.
Using Masks for Non-Destructive Editing
Non-destructive editing is key in Photoshop. It lets editors undo changes and improve images without losing quality. Layer masks in Photoshop are crucial for this. They allow you to edit parts of an image, not the whole thing. This way, you keep the image details and flexibility during editing.
With non-destructive editing techniques, you layer edits on top of the image. This means you can see and change each edit separately from the original. It’s great because it keeps the original photo safe for any future changes or corrections.
- They keep your original photo safe and untouched.
- They let you edit and re-edit without making extra, unwanted changes.
- They give you more control over where and how you make adjustments.
Using layer masks with other Photoshop tools makes editing better. For example, applying a mask to an adjustment layer helps you control color or exposure changes. This way, you can preserve image details while getting the look you want.
Learning to use these masks well keeps your images sharp and enhances your skills. It turns every Photoshop project into a chance to show off your creative side.
Adjusting Contrast and Color for a Realistic Look
When you’re doing realistic photo editing, adjusting contrast and color in Photoshop is key. These steps help your edited photos look natural and smooth. They make sure the edited parts blend well with the rest of the photo.
Adjusting contrast means making colors lighter or darker to add depth. This step prevents your photo from looking flat after removing unwanted reflections. Color correction keeps the photo’s true colors, making it look like you’re seeing it with your own eyes.
Both contrast and color correction need a careful touch. Here are some tips to help you:
- Start with the histogram: Check the histogram panel in Photoshop to see the contrast levels. A balanced histogram means good contrast in your photo.
- Adjust Levels and Curves: Use Levels and Curves to change contrast. This makes your photo look three-dimensional and clear.
- Employ the Vibrance tool: Use Vibrance to make colors pop without overdoing it. It’s great for keeping skin tones and other colors right.
- Utilize color balancing: Adjust Color Balance to make colors work together. Focus on highlights, midtones, and shadows to keep the photo balanced.
Always compare your edited photo to the original. This helps you stay true to the photo’s original look. It keeps your edits from changing the photo’s true essence.
Advanced Techniques: Working with Layers
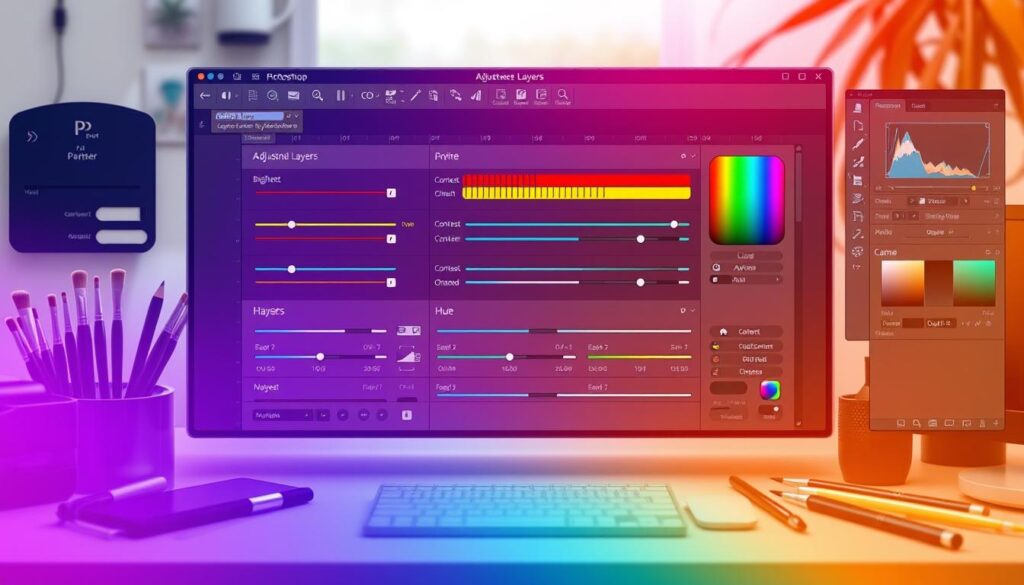
Exploring Photoshop’s depths, learning Photoshop layer techniques is key for better image quality, especially with reflections. This part looks at using blend modes and adjustment layers to improve your editing skills.
Layer Blend Modes
Blend modes in Photoshop let you mix layers in new ways. They decide how a layer blends with others, changing the image’s color and brightness. For removing reflections, some blend modes are great for blending or highlighting parts of your photos.
Utilizing Adjustment Layers
Adjustment layers are a strong Photoshop layer technique for editing without harming the original. They let you change the image’s color and tone without permanent damage. This is vital for tweaking details hit by unwanted reflections.
| Blend Mode | Use Case | Effect on Image |
|---|---|---|
| Multiply | Darkening Elements | Intensifies shadows, perfect for deepening dark areas in reflections. |
| Overlay | Enhancing Texture | Balances light and dark, enhancing texture visibility without overwhelming the image’s natural colors. |
| Soft Light | Subtle Contrast Adjustment | Softens contrasts, ideal for slight adjustments in brightness and exposure around reflective surfaces. |
| Hard Light | Intense Color and Contrast Boost | Increases contrast dramatically, making it useful for stark enhancements in specific areas of the reflection. |
Handling Difficult Reflections with Precision
Dealing with tough reflections in Photoshop requires a precise selection. The Pen Tool and Refine Edge feature make editing easier. They help handle complex reflection scenarios well.
Using Pen Tool for Selection
The Pen Tool is key for detailed selections around chrome reflections. It creates precise paths for isolating reflective parts. This is crucial for editing and making adjustments.
This tool is great when other selection tools can’t capture the details of complex shapes.
The Role of the Refine Edge Feature
After using the Pen Tool, Refine Edge in Photoshop is essential. It smooths edges, adjusts feathering, and contrast. This makes the edited image look more real.
This feature is very useful for blending the selected area back into the image. It makes sure the changes look like they were part of the original photo.
Refining the Edges for a Seamless Finish
Learning edge refinement Photoshop is key for smooth edges. This is important for both digital portraits and product photos. The goal is to make the edited parts blend perfectly with the rest of the image.
Good seamless photo retouching means fixing flaws and making edges smooth. This blending removes any harsh lines that could ruin the photo’s flow.
- Start by zooming in on areas needing edge work. Look for any texture or edge quality mismatches.
- Use the Smudge tool for gentle blending. It’s great for spots where a sharp edge looks unnatural.
- Feathering helps soften edges. It creates a smooth transition between edited and original pixels.
- Work on each layer separately. This ensures each one adds to the overall image quality.
By following these steps, you’ll improve your image editing skills. The aim of edge refinement Photoshop is to make any changes invisible. This boosts the quality of your photos.
Common Mistakes to Avoid When Removing Reflections
When editing photos in Photoshop, photographers often make common mistakes. This section will show you what to watch out for. It will help you improve your skills and get better results.
- Over-reliance on Automatic Tools: Photoshop’s tools, like the healing brush, can be helpful. But relying too much on them can cause problems. The texture and lighting might not match the rest of the image.
- Inadequate Use of Layers: Not using layers can make your edits permanent. This means you can’t easily go back to earlier versions of your work.
- Ignoring the Lighting Direction: Keeping the lighting consistent is key when removing reflections. If you don’t, the final image might look unnatural.

| Mistake | Problems Caused | Reflection Removal Tips |
|---|---|---|
| Not masking properly | Edits can affect areas you didn’t mean to, making corrections hard. | Always use masks for non-destructive edits, allowing adjustments anytime. |
| Poor clone stamp usage | Using it too much can create unnatural patterns that are easy to spot. | Use clone stamp sparingly and blend using soft brush settings. |
| Forgetting to check all angles | Missing reflections at certain angles can ruin your edit. | Inspect the image at different zoom levels and angles before finalizing. |
These mistakes can make your work look amateurish. But, by avoiding them, you can make your reflection removal in Photoshop look seamless. Follow these tips to improve your editing skills and create stunning, realistic images.
Practical Tips for Efficient Workflow in Photoshop
Improving your Photoshop skills means more than just learning new techniques. It’s also about using the software more efficiently. This section will share key tips for better workflow in Photoshop. You’ll learn how to customize tools and use keyboard shortcuts.
Keyboard Shortcuts
Photoshop keyboard shortcuts are key to speeding up your work. They let you do things faster than using menus. Here’s a quick guide:
Custom Tool Settings
Customizing tools in Photoshop makes your workspace better fit your needs. You can make the toolbar simpler by removing tools you don’t use often. This helps keep your workspace clean.
For example, right-click on the toolbar and choose ‘Edit Toolbar…’. Then, drag and drop tools to add or remove them.
Creating custom keyboard shortcuts for your favorite actions is another great tip. You can do this in ‘Edit > Keyboard Shortcuts’.
Using these tips can make your work more efficient. It saves time on repetitive tasks, letting you focus on the creative parts of your projects.
Before and After: Demonstrating the Impact
Showing a Photoshop before and after side by side is very effective. It not only shows the technical changes but also the visual impact of editing. Below, we’ll compare the original and edited images to show how well unwanted chrome reflections can be removed.
The image editing comparison table we’ve prepared gives a detailed look at the changes. It highlights the visual differences and the specific Photoshop techniques used. This example inspires photographers and editors by showing how to enhance image aesthetics and detail clarity.
The visual impact of editing can be huge. It not only makes the image look better but also ensures the subject is seen as intended. With careful use of Photoshop tools, a compromised photo can become a striking, high-quality image that looks appealing and professional.
Conclusion
In this guide, we explored how to remove chrome reflections using Adobe Photoshop. It’s not just about getting rid of shine. It’s also about making your photos look better. Learning Photoshop takes time, and these techniques are a big step forward.
We covered the key tools and methods, like the Clone Stamp and Healing Brush. We also talked about using layers and masks. These tools help you deal with tough reflections on chrome surfaces.
Removing reflections is key in photo editing. It’s not just about following steps. It’s also about blending and tweaking to make the edits look natural. As Photoshop gets better, so can your editing skills.
Photoshop is both technical and creative. The tips in this guide are a starting point for your own creativity. I hope you use these techniques to improve your photos and join the editing community.
With practice, these skills will become easy for you. You’ll be able to handle reflections like a pro. This will add to your editing skills, making you even better at photo retouching.
FAQ
What are the challenges of removing chrome reflections in Photoshop?
Removing chrome reflections is tricky because of their shiny and reflective nature. They often have many reflections and highlights. These can take away from the main focus of the image.
How can I prepare my image for reflection removal in Photoshop?
First, make a backup layer to keep the original image safe. Then, look at the reflection to see how complex it is. Plan your editing carefully to do it right.
Which Photoshop tools are essential for chrome reflection removal?
The Clone Stamp Tool, Healing Brush Tool, and Patch Tool are key for removing unwanted reflections. Each tool has its own use in the editing process.
Can you outline a step-by-step process for removing reflections in Photoshop?
Start by checking the chrome reflection. Choose the right tools. Create a clean area to work from. Then, apply edits carefully and refine the edges for a smooth finish.
Are there ways to perform non-destructive editing when removing reflections?
Yes, using layer masks in Photoshop lets you edit without harming the original image. This way, you can change your edits later if needed.
How do I adjust contrast and color to achieve a realistic look after removing reflections?
To blend the edited area with the rest of the image, adjust contrast and color. Make sure they match the surrounding areas for a natural look.
What advanced Photoshop techniques can I use to enhance reflection removal?
For better results, use layers, layer blend modes, and adjustment layers. These techniques give you more control over the reflection removal process, improving the image’s quality.
How can I handle difficult chrome reflections with precision in Photoshop?
For precise work, use the Pen Tool for selections and the Refine Edge feature to refine those selections. This is especially helpful for hard-to-remove reflections.
What are some common mistakes to avoid when removing reflections from chrome surfaces?
Avoid over-editing and not creating a proper sample area for the clone stamp or healing brush. Also, make sure to match the lighting and texture of the surrounding image.
Can you share some practical tips for an efficient workflow in Photoshop?
For a smooth workflow, use keyboard shortcuts and customize tool settings. Also, use layer masks and adjustment layers for non-destructive edits.
How impactful can before and after images be when demonstrating chrome reflection removal in Photoshop?
Before and after images show the big difference reflection removal can make. They highlight the visual improvement and the quality boost of the edited image.

