Turning everyday photos into great ones is easy. You don’t need to be a pro. Just a few simple steps can make a big difference. Whether you’re using a phone or computer, small changes can make a big impact.
Apps like Adobe Lightroom Mobile or Apple Photos make editing easy. Even if you’re new, you can learn to make photos look better. These tips are for anyone who wants to tell stories with their photos. Are you ready to learn the basics?
Understanding the Basics of Photo Editing
Learning basic editing techniques starts with the basics. Every pro starts here, learning about light, color, and structure. Tools like Lightroom, Photoshop, or even phone apps share these basics. Let’s look at the key points.
Overview of Editing Fundamentals
- Exposure: Adjust brightness without overdoing highlights or shadows.
- Contrast: Balance midtones to give photos depth and dimension.
- Saturation: Boost colors naturally—vivid but never garish.
- Cropping: Trim edges to focus attention on the subject.
Establishing a Clear Workflow
Follow a simple process. Start by:
- Loading images into your software (e.g., Adobe Lightroom or Snapseed).
- Fix major issues first: exposure, then color, then cropping.
- Save versions frequently—name files like “edited_v2” to avoid confusion.
Practice these basic editing techniques every day. Small changes add up. Check out free tutorials on YouTube channels like Phlearn or Skylum’s blog. Remember, even pros follow these steps every time.
How do you make photos look professional with basic editing?
Learning these photo enhancement tricks starts with light, contrast, and color. These are key to making photos pop. First, balance the light to show hidden details.
Enhancing Lighting Techniques
Lighting fixes can save photos that are too dark or too bright. Start with brightness and exposure sliders. Then, adjust shadows and highlights to bring out details.
A gradient tool helps fix harsh light, like from windows or flash. This makes your photos look better.
Adjusting Contrast and Clarity
- Boost contrast to add depth without making shadows too dark or highlights too bright.
- Use the clarity tool to sharpen midtones—avoid over-sharpening edges that look unnatural.
- Curves adjustments offer precise control over contrast for a more professional finish.
Emphasizing Color Balance
Color balance makes images feel real. Start by fixing white balance to remove color casts. Then, adjust color channels to fix skin tones or shadows.
Saturation and vibrance sliders make colors pop without being too much. These steps together make your photos look great. Try these photo enhancement tricks to find what works best for you. Even small changes can make a big difference.
Selecting the Right Editing Software
Finding the best editing software starts with looking at editing software reviews. Beginners might like apps like Canva or Snapseed. But, pros often go for Adobe Lightroom or Photoshop. Free tools like GIMP also have great features without costing you anything.
- Adobe Lightroom: Organizes large photo libraries and offers advanced color grading.
- Canva: User-friendly for social media graphics and presets.
- GIMP: Open-source alternative with layer and filter tools.
Check out editing software reviews to see how different tools work. Try free trials before you buy. Think about what you need to do with your photos.
Online guides and forums can help. They tell you what’s good and bad about each tool. Remember, simple edits need simple tools, but complex ones need more.
Mastering Color Correction Techniques
Color correction makes photos stand out. It’s key for portraits and landscapes. Color correction guides show how to fix colors. Small tweaks can make big differences.
Identifying Color Inconsistencies
First, look for odd colors. You might see:
- Skin tones that are too yellow or blue
- Gray things with pink or green looks
- Too bright skies or dark shadows
Using White Balance Tools
White balance tools fix color casts. In Adobe Lightroom, the eyedropper tool finds a neutral gray. This corrects warm indoor shots or blue outdoor ones.
Practical Color Grading Tips
Color grading adds style. Start with presets, then adjust sliders. Choose colors that match the mood. Use split-screen view to see changes.
Essential Editing Tools and Features
Every photo editor needs key features to make photos look great. Tools like layers, brushes, and masks are very important. They help make small changes without making things too hard.
Adobe Photoshop and Lightroom have great tools. The healing brush fixes spots, and gradient filters even out skies. Try these in free software like GIMP or on your phone to see how easy they are.
- Use layers to try out different looks without messing up the original.
- Brushes let you make small changes that look natural.
- Masks help keep certain parts of the photo safe from changes.
Learning these tools can make you more creative. Check out presets in DxO PhotoLab for quick access. Even simple tools can make amazing photos with a little practice.
Improving Composition Through Crop and Alignment
Great composition starts with how you frame your subject. Cropping and aligning elements can make a big difference. Let’s look at simple steps to improve your photos with basic editing tools.
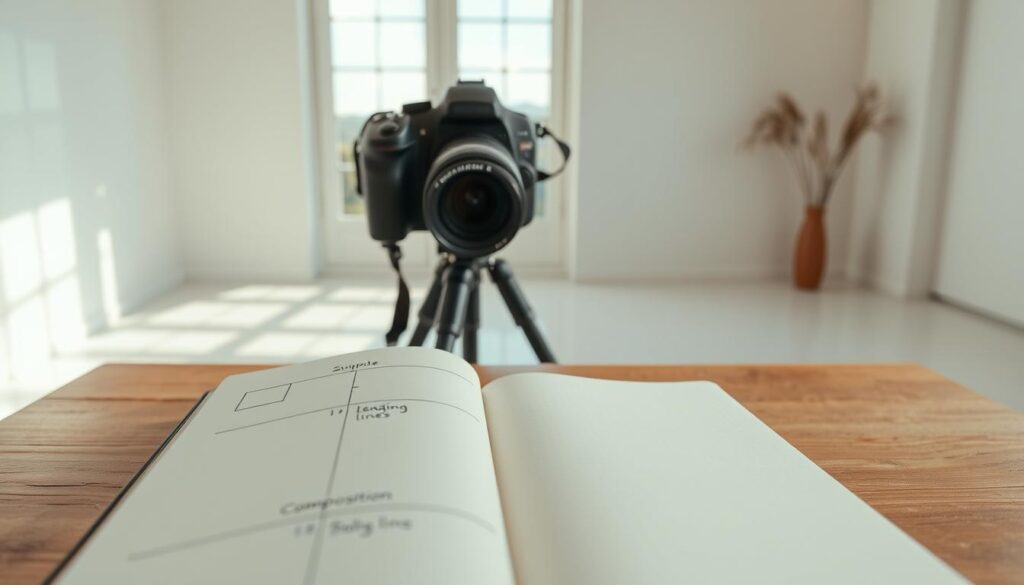
Start with the rule of thirds. Imagine a grid dividing your image into nine parts. Place key subjects on these lines or at their corners. For example, put a horizon on the top or bottom third for balance.
This adds life to both landscapes and portraits.
- Use grid overlays in apps like Adobe Lightroom or Snapseed to see the rule of thirds.
- Align vertical lines (like trees or buildings) with grid guides for symmetry.
- Crop tightly around the subject to cut out distractions.
Grid overlays are for everyone, not just beginners. Even pros like Annie Leibovitz use them. Try different crops by zooming in or rotating photos. This can bring out textures or focus points.
Play with your camera’s grid lines while shooting. Then, make small changes in editing. These composition tips can really help your photos. Try them next time you edit!
Simple Retouching Tips for Professional Results
Small changes can make a big difference in photos. Professional retouching is all about making small tweaks. These tweaks highlight the best parts of an image without overdoing it. Start with the basics to make your photos shine.
Removing Distractions
Tools like Adobe Photoshop or Skylum Luminar can remove unwanted details. Use the Spot Healing Brush to get rid of blemishes or stray hairs. For bigger problems, the Clone Stamp Tool copies pixels from one place to another. Always zoom in to make sure your edits are not seen.
Smoothing Skin and Enhancing Details
Use the Healing Brush or Portrait Mode in apps like Snapseed to smooth skin. Use a low opacity setting to reduce harsh textures. Brighten highlights and soften wrinkles with care. Remember, don’t over-smooth to keep skin looking natural.
Maintaining Natural Looks
Balance is important. Use a 50% opacity layer to blend edits smoothly. Zoom out to see the whole image and check if edits look good. Make sure the final image feels real.
Balancing Exposure and Shadows
Getting the right exposure and shadows is crucial for great photos. Exposure balancing strategies help keep highlights right and shadows clear. Start by adjusting shadows first. This makes dark areas look better without adding noise.
Then, work on highlights to keep bright spots detailed. This is important to avoid losing important details.
- Use the shadow recovery tool in Adobe Lightroom to brighten dark zones
- Adjust midtones to balance overall brightness without overdoing contrast
- Check histograms to ensure no clipping in shadow/highlight areas
| Issue | Solution | Tool |
|---|---|---|
| Flat shadows | Increase shadow sliders 10-20% | Adobe Photoshop |
| Overbright highlights | Lower exposure then recover highlights | DxO PhotoLab |
| Backlit silhouettes | Use gradient filters to darken bright backgrounds | Skylum Luminar |
Pro tip: Always work non-destructively using adjustment layers in Photoshop. Test different exposure balancing strategies on copies of your original file. Remember—balanced shadows and highlights create depth without losing important details. Practice these steps to achieve natural, polished results every time!
Using Presets and Filters Effectively
Presets and filters can make ordinary shots look amazing in seconds. But, they work best when you adjust them to fit your style. Creative presets are like templates, but tweaking them makes them yours. Filters add mood, but using them wisely keeps things balanced.

Customizing Preset Settings
Begin by trying out default presets in apps like Adobe Lightroom or Skylum Luminar. Lower the saturation on a landscape preset to keep greens bright but real. Name your adjusted presets like “Soft Morning” or “Urban Noir” for easy use. Spending 10-15 minutes tweaking now saves time later.
Combining Filters for Unique Looks
Layering filters adds depth. Here’s how to do it:
- Start with a moody film grain filter.
- Then, add a subtle vintage overlay on a lower opacity layer.
- Adjust the highlights to balance everything.
Don’t use more than three filters at once. Too many can clash.
Try presets from places like Preset Queen or FilterGrade. Check your work on both phone and desktop screens. This helps catch any mistakes. The aim is to make your workflow smoother without losing your personal touch.
Optimizing Images for Social Media and Web
After perfecting your edits, social media photo optimization makes your images pop. Follow these steps to keep quality high. This way, your images will look great everywhere.
Resizing and Compression Best Practices
- Resize images to match platform specs: Instagram posts need 1080×1350 pixels, while Pinterest thrives on 1200×630.
- Use 80-85% JPEG compression to balance file size and clarity.
- Avoid overcompressing—pixelation ruins even the best edits.
Color Profiles for Digital Platforms
Color profiles show how colors look online. Choose sRGB for web and social media. This ensures colors look the same on all devices. Adobe RGB is better for print but may look dull on screens.
- Facebook: Optimize for sRGB
- Twitter: Stick to platform-recommended dimensions
- Website blogs: Use 72 DPI for web-friendly resolution
Pro tip: Always save a high-res original file before optimizing copies. This way, you keep flexibility for future use. And you can share perfectly sized images online.
Common Mistakes to Avoid in Basic Photo Editing
Editing photos is fun, but small mistakes can mess up your work. Here’s how to avoid common editing mistakes to keep your photos sharp:
- Over-editing highlights: Too much brightness or contrast can lose details. Use sliders carefully and check changes at 100% zoom.
- Ignoring color consistency: Not adjusting white balance first can make colors look wrong. Fix lighting first, then colors.
- Saving without backups: Always make a copy of your layers before editing. This way, you can go back to the original if needed.
Skipping these steps can ruin your photos. Avoiding these mistakes keeps your work smooth and your photos sharp.
Conclusion
Everyday photos can become amazing with basic photo editing insights. Start by adjusting brightness, contrast, and cropping. This helps draw attention to the right parts.
Use tools like Adobe Lightroom’s presets or Snapseed for free. They help with skin texture and color. Always work slowly and naturally to avoid overdoing it.
Try balancing shadows and using filters. Share your work on Instagram. Getting feedback helps you improve.
Small changes can make a big difference. Keep trying new things. Soon, you’ll be making great photos easily.
FAQ
What are the basic concepts of photo editing that beginners should know?
Start with the basics like exposure, contrast, and saturation. Learning these will make your photos better.
How can I improve lighting in my photos?
Improve lighting by adjusting brightness and highlights. Try adding shadows for a pro look.
What are some popular editing software options for beginners?
Beginners have many choices. Free apps like Canva and paid ones like Adobe Lightroom are great. Pick what feels right for you.
How do I correct color inconsistencies in my images?
Check your images for color issues. Use white balance tools to fix them and get a balanced look.
What is the rule of thirds in photography, and how do I use it?
The rule of thirds divides your image into a 3×3 grid. Place important things on these lines for better photos.
How can I remove distractions from my photos effectively?
Use editing tools to remove unwanted stuff. Crop or use healing brushes for a clean look.
What are some tips for balancing exposure and shadows in my images?
Adjust brightness and shadows and check the histogram. Aim for the right exposure for best visuals.
How can I optimize my images for social media?
Resize images for each platform and use the right color profiles. Compress files to load faster without losing quality.
What common mistakes should I avoid in photo editing?
Don’t over-edit, save originals, and keep your workflow organized. These tips help you edit better and get better results.

