Choosing the right photo editing software can be hard. Lightroom and Photoshop both have great tools. But, which one is best for beginners?
Lightroom is great for beginners because it’s organized. Photoshop has advanced tools that might look scary at first.
Understanding Lightroom: Features and Benefits
Adobe Lightroom has tools that make photo editing easy for new users. Its Lightroom features are simple yet powerful. This makes it great for those new to digital photography. Let’s look at what makes it special.
| Lightroom Feature | Benefit |
|---|---|
| Non-destructive editing | Preserves original files while experimenting with adjustments |
| Keyword tagging | Organize photos with keywords for quick searches |
| Adobe Creative Cloud sync | Access edits across devices instantly |
Features of Lightroom
Lightroom has tools for organizing photos. You can tag, filter, and search through many photos. The benefits of Lightroom include a simple workspace. You can adjust brightness, contrast, and color with sliders.
User-Friendly Interface
- Drag-and-drop uploads with one-click presets
- Side panels for quick access to adjustments
- Preview panes showing before/after comparisons
These features make beginner-friendly editing easy. You don’t need to know how to code or use complex menus. Just simple controls to improve your photos step by step.
Exploring Photoshop: Capabilities for Beginners
Adobe Photoshop is a big deal for photo editing. It has advanced editing tools that do more than just fix pictures. Even though Photoshop for beginners might look hard, it’s worth learning. Let’s see what you can expect.
Learning Curve Insights
The Adobe Photoshop learning curve is easy at first but takes time. New users might feel lost at first. But, with the right steps, you can get better.
- Watch official tutorials on Adobe’s website or YouTube
- Start with basic tools like layers and brushes
- Practice every day to get better
Online places like Reddit’s r/Photoshop have free tips and help.
Advanced Editing Tools
When you get the hang of it, try advanced editing tools like:
- Layers: Make changes without messing up the original
- Masks: Make changes only to certain parts
- Filters: Add cool effects like oil paint or sketch textures
These tools help you make pictures look amazing. Start with simple things and get better slowly.
Comparison: Which is better: Lightroom or Photoshop for beginners?
Choosing between Lightroom and Photoshop starts with understanding their Lightroom vs Photoshop comparison. Let’s break down their key differences to help you decide which fits your needs best.
User Interface Differences
| Feature | Adobe Lightroom | Adobe Photoshop |
|---|---|---|
| Layout | Organized photo library view | Layered design for complex edits |
| Navigation | Intuitive cataloging tools | Complex tool panels for advanced tasks |
| Tools | Preset-based adjustments | Customizable brush and masking options |
Workflow Analysis
- Lightroom’s user interface differences prioritize batch editing, making it ideal for photo management.
- Photoshop’s non-destructive editing requires mastering layer workflows, which may slow down new users.
For editing workflow analysis, consider your goals: Lightroom excels in organizing and enhancing groups of photos. Photoshop shines for intricate edits like compositing or portraits.
Setting Up Your Editing Workspace
Your editing workspace setup affects how you work with Lightroom and Photoshop. A tidy photo editing environment makes your eyes happy and work faster. Pick a quiet, bright spot. Make sure your monitor is at eye level to avoid neck pain.
Make your digital space your own too. In Lightroom, move panels to where you need them most. Photoshop users can save special workspace optimization setups for tasks like fixing photos or changing colors. Here’s how:
- Lightroom: Drag modules to the side panels. Use the “Reset Workspace” button to go back to the start if needed.
- Photoshop: Right-click the menu bar and select “Workspace” to switch between presets like “Essentials” or “3D.”
| Hardware Tips | Software Tips |
|---|---|
| Use a color-calibrated monitor for accurate colors | Pin favorite tools to the toolbar for quick access |
| Invest in an ergonomic chair | Enable keyboard shortcuts for faster edits |
Try out different layouts until you find the perfect one for you. A clean desk and organized software help you focus on being creative, not stressed. Start simple and change things as you get better.
Importing and Organizing Photos Effectively
Managing your photo collection is easy. Use Lightroom or Photoshop for these photo management tips. First, import photos into Lightroom’s easy-to-use interface. This makes importing photos simple from cameras or drives.
Don’t spread files all over. Create a special folder system right away.
Import Best Practices
- Use batch import to add multiple files at once
- Apply file naming conventions (e.g., “2024-09-20_Vacation.jpg”)
- Enable metadata backups for easy recovery
Organization Strategies
Sort photos by theme or date. In Lightroom, use stars and keywords for portraits, landscapes, or events. Photoshop users can link files to a main catalog.
Get rid of duplicates and archive old photos. This keeps your organizing photo library neat.
Use Lightroom’s search filters or Photoshop’s batch tools. A clean system saves time and boosts creativity. So, your next project will be a success.
Basic Editing Techniques in Lightroom
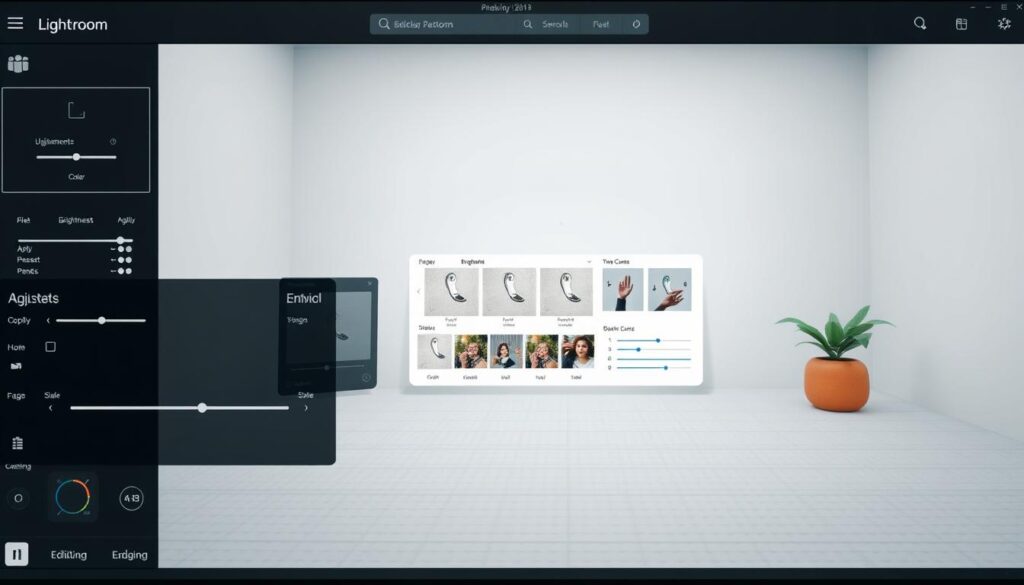
Learning basic Lightroom editing means mastering three key skills. These are adjusting exposure, enhancing colors, and improving composition. These steps turn raw photos into beautiful images without needing complex tools. Let’s explore each one.
Adjusting Exposure
Start by adjusting exposure to balance light and dark. Use the Exposure slider to make the whole image brighter or darker. Then, the Shadows slider brings out details in dark areas.
The Highlights and Whites sliders prevent too much light in bright spots. Remember, see changes as you make them to avoid big mistakes.
Enhancing Colors
For color enhancement, first use the Vibrance slider. It makes colors pop without making skin tones too bright. The Saturation slider changes all colors at once.
Use HSL panels to adjust specific colors. For example, deepen blues in the sky or warm up skin tones. Small changes can make a big difference.
Cropping and Straightening
Good composition is key, and photo cropping techniques help. Use the Crop tool to change the size or shape of your image. Press Shift while rotating to fix straight lines.
Choose aspect ratios like 4:5 or 1:1 for social media. Crop tightly to draw attention to your main subject.
Keep practicing these steps. Small changes in Lightroom can make a big impact. Your photos will soon look sharper, brighter, and more professional.
Fundamental Tools in Photoshop for Beginners
Learning Photoshop starts with mastering its core features. This section focuses on fundamental Photoshop tools like layer management techniques, Photoshop retouching basics, and filters and effects. Each tool builds skills essential for editing confidence.
Layer Management
Layers let you edit without permanently altering your image. Key techniques include:
- Stacking layers to separate elements (e.g., text over photos).
- Locking transparency to edit specific areas.
- Using adjustment layers for non-destructive edits.
Retouching Basics
Fix blemishes and imperfections with these steps:
- Spot Healing Brush: Click and drag over flaws for instant removal.
- Clone Stamp: Copy pixels from one area to another.
- High Pass Filter: Sharpen edges without over-processing skin.
“Layers are like digital sticky notes—stack them, hide them, or delete them without losing original data.”
Filters and Effects
Transform photos with built-in filters:
- Camera Raw Filter adjusts color and contrast globally.
- Texture Overlay adds grain or paper textures.
- Stylize > Find Edges creates artistic outlines.
Experiment in small increments to avoid over-editing.
Practical Tips for Editing Workflow Optimization
Start saving time with small changes. These editing productivity tips will help a lot:
- Learn keyboard shortcuts: Tools like Lightroom’s “L” for spot removal or Photoshop’s “Ctrl+J” for layers cut steps and speed up edits.
- Automate repetitive tasks: Use Lightroom presets for color grading or Photoshop actions for batch resizing. Automation keeps workflows consistent.
- Organize files smartly: Use folders named by project dates or themes. Software like Adobe Bridge helps tag and search files quickly.
Small changes can save a lot of time. Start with one tip each week. Like setting up a preset folder. Over time, these choices make editing workflow optimization easy.
Troubleshooting Common Editing Challenges
Editing can sometimes lead to unexpected errors. Editing troubleshooting is key to keeping your workflow smooth. Let’s break down solutions for common hurdles.
Understanding Error Messages
Strange alerts like “file not found” or “out of memory” often point to simple fixes:
- File path issues: Save projects in accessible folders to avoid “not found” errors.
- Memory warnings: Close other apps or reduce image size in Lightroom or Photoshop.
- Outdated software: Update Adobe apps via Creative Cloud to resolve compatibility problems.
Fixing Export Issues
Fixing export issues starts with checking settings. Follow these steps:
- Verify file formats: JPEG or PNG work best for most sharing needs.
- Adjust resolution: Set to 300 DPI for prints; 72 DPI for web use.
- Test with small files first to spot glitches before exporting full batches.
For resolving editing errors, restart the app or try a different export location. Forums like Adobe’s community or YouTube tutorials offer step-by-step guides. Remember: most problems have quick fixes once you know where to look!
Choosing Software Based on Your Needs
Choosing between Lightroom and Photoshop depends on your goals. Think about your editing use cases, budget, and learning style. Here’s how to find the best match.
Use Cases and Scenarios
Choose the right tool for your projects. For example:
Budget Considerations
Adobe Lightroom costs $9.99/month alone. Photoshop is $20.99/month with Creative Cloud. For budget-friendly editing, consider:
- Lightroom’s discounted bundle with Photoshop
- Free trials to test both tools
- Open-source options like GIMP if budget is tight
Available Learning Resources for Editing
Learn with these resources:
- Adobe’s official learning resources for editing (tutorials, webinars)
- YouTube channels like “Adobe Creative Cloud” or “SLR Lounge”
- Free courses on Skillshare or Udemy for foundational skills
Try free trials and community forums to practice without spending.
Conclusion
When choosing between Lightroom and Photoshop, think about what you want to do. Lightroom is great for organizing and making quick edits. It’s perfect for those who want to work fast.
Photoshop is better for detailed work. It has advanced tools but takes more time to learn. Decide based on what you need: speed or detail.
Every beginner needs to know what they want. If you like organizing photos or making portraits look better, Lightroom is for you. For complex edits, Photoshop is the way to go.
Adobe offers free trials for both. Try them out to see which one you like better.
Don’t worry if you make mistakes. There are lots of online resources to help you get better. Start with what you like and keep practicing.
Remember, your creativity is the only limit. Choose your tool and start making amazing photos!
FAQ
Which software is better for beginners, Lightroom or Photoshop?
Lightroom is easy for beginners because it’s simple and organized. But, Photoshop has more features for advanced users. It’s harder to learn but offers more.
How do I import photos into Lightroom effectively?
To import photos in Lightroom, open the Import dialog. You can pick many photos at once. Use keywords or metadata to organize them later.
What are some basic editing techniques I should know for Lightroom?
Start with adjusting exposure and color in the HSL panel. Learn to crop and straighten images. These skills are essential for great photos.
Is there a significant learning curve with Photoshop?
Yes, Photoshop is tough for beginners. It takes time to learn layers, masks, and tools. But, mastering these skills is very rewarding.
Can I perform basic photo retouching in Lightroom?
Lightroom has basic retouching tools like the Healing Brush. It’s good for small fixes. But, Photoshop is better for complex retouching.
How can I optimize my editing workflow?
Use keyboard shortcuts and organize your files well. Take advantage of automation in both Lightroom and Photoshop. This makes editing faster.
How do I troubleshoot common issues while editing?
Understand error messages and use help resources. For export problems, check your settings and disk space.
What factors should I consider when choosing between Lightroom and Photoshop?
Think about what you need to edit. Do you want simple edits or advanced features? Also, consider your budget and learning resources for each program.

